[email protected]). You need to verify ownership of the domain by adding specific DNS records provided by Nuntly.
You need a Nuntly account and access to the DNS settings of the domain you want to use. If you don’t own a domain yet, register one through any
domain registrar.
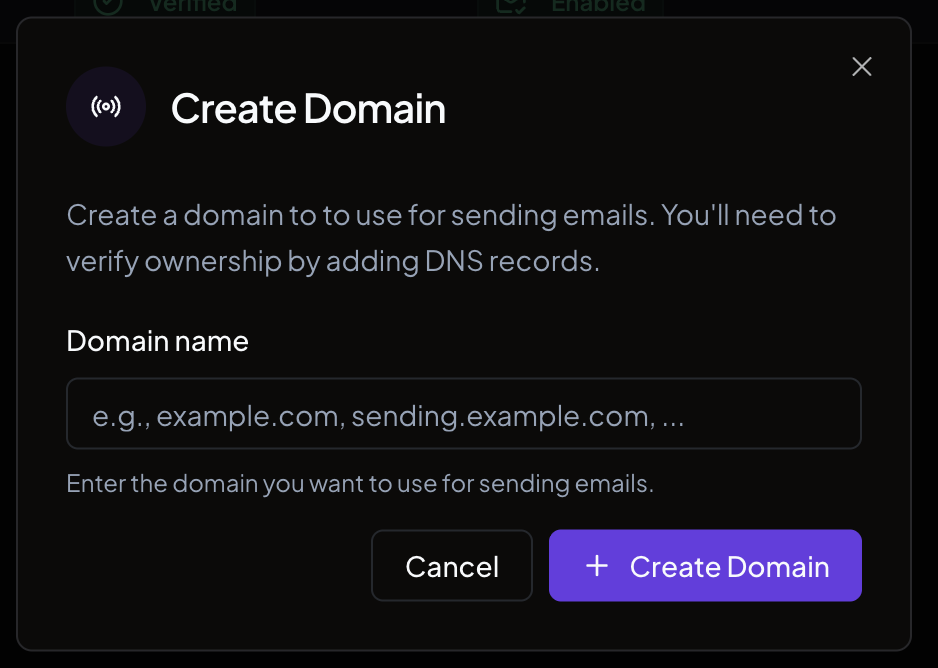
Create a sending domain
- In the dashboard, go to Domains
- Click Create Sending Domain
- Enter your domain name (for example,
example.comorsending.example.com) - Click Create Domain
Configure DNS records
Nuntly generates four types of DNS records that you need to add to your DNS provider:| Record type | Purpose |
|---|---|
| DKIM | Authenticates your email and proves it was sent by you |
| SPF | Specifies which mail servers are allowed to send on behalf of your domain |
| DMARC | Defines how your domain handles emails that fail DKIM or SPF checks |
| MX | Routes bounce and complaint notifications back to Nuntly |
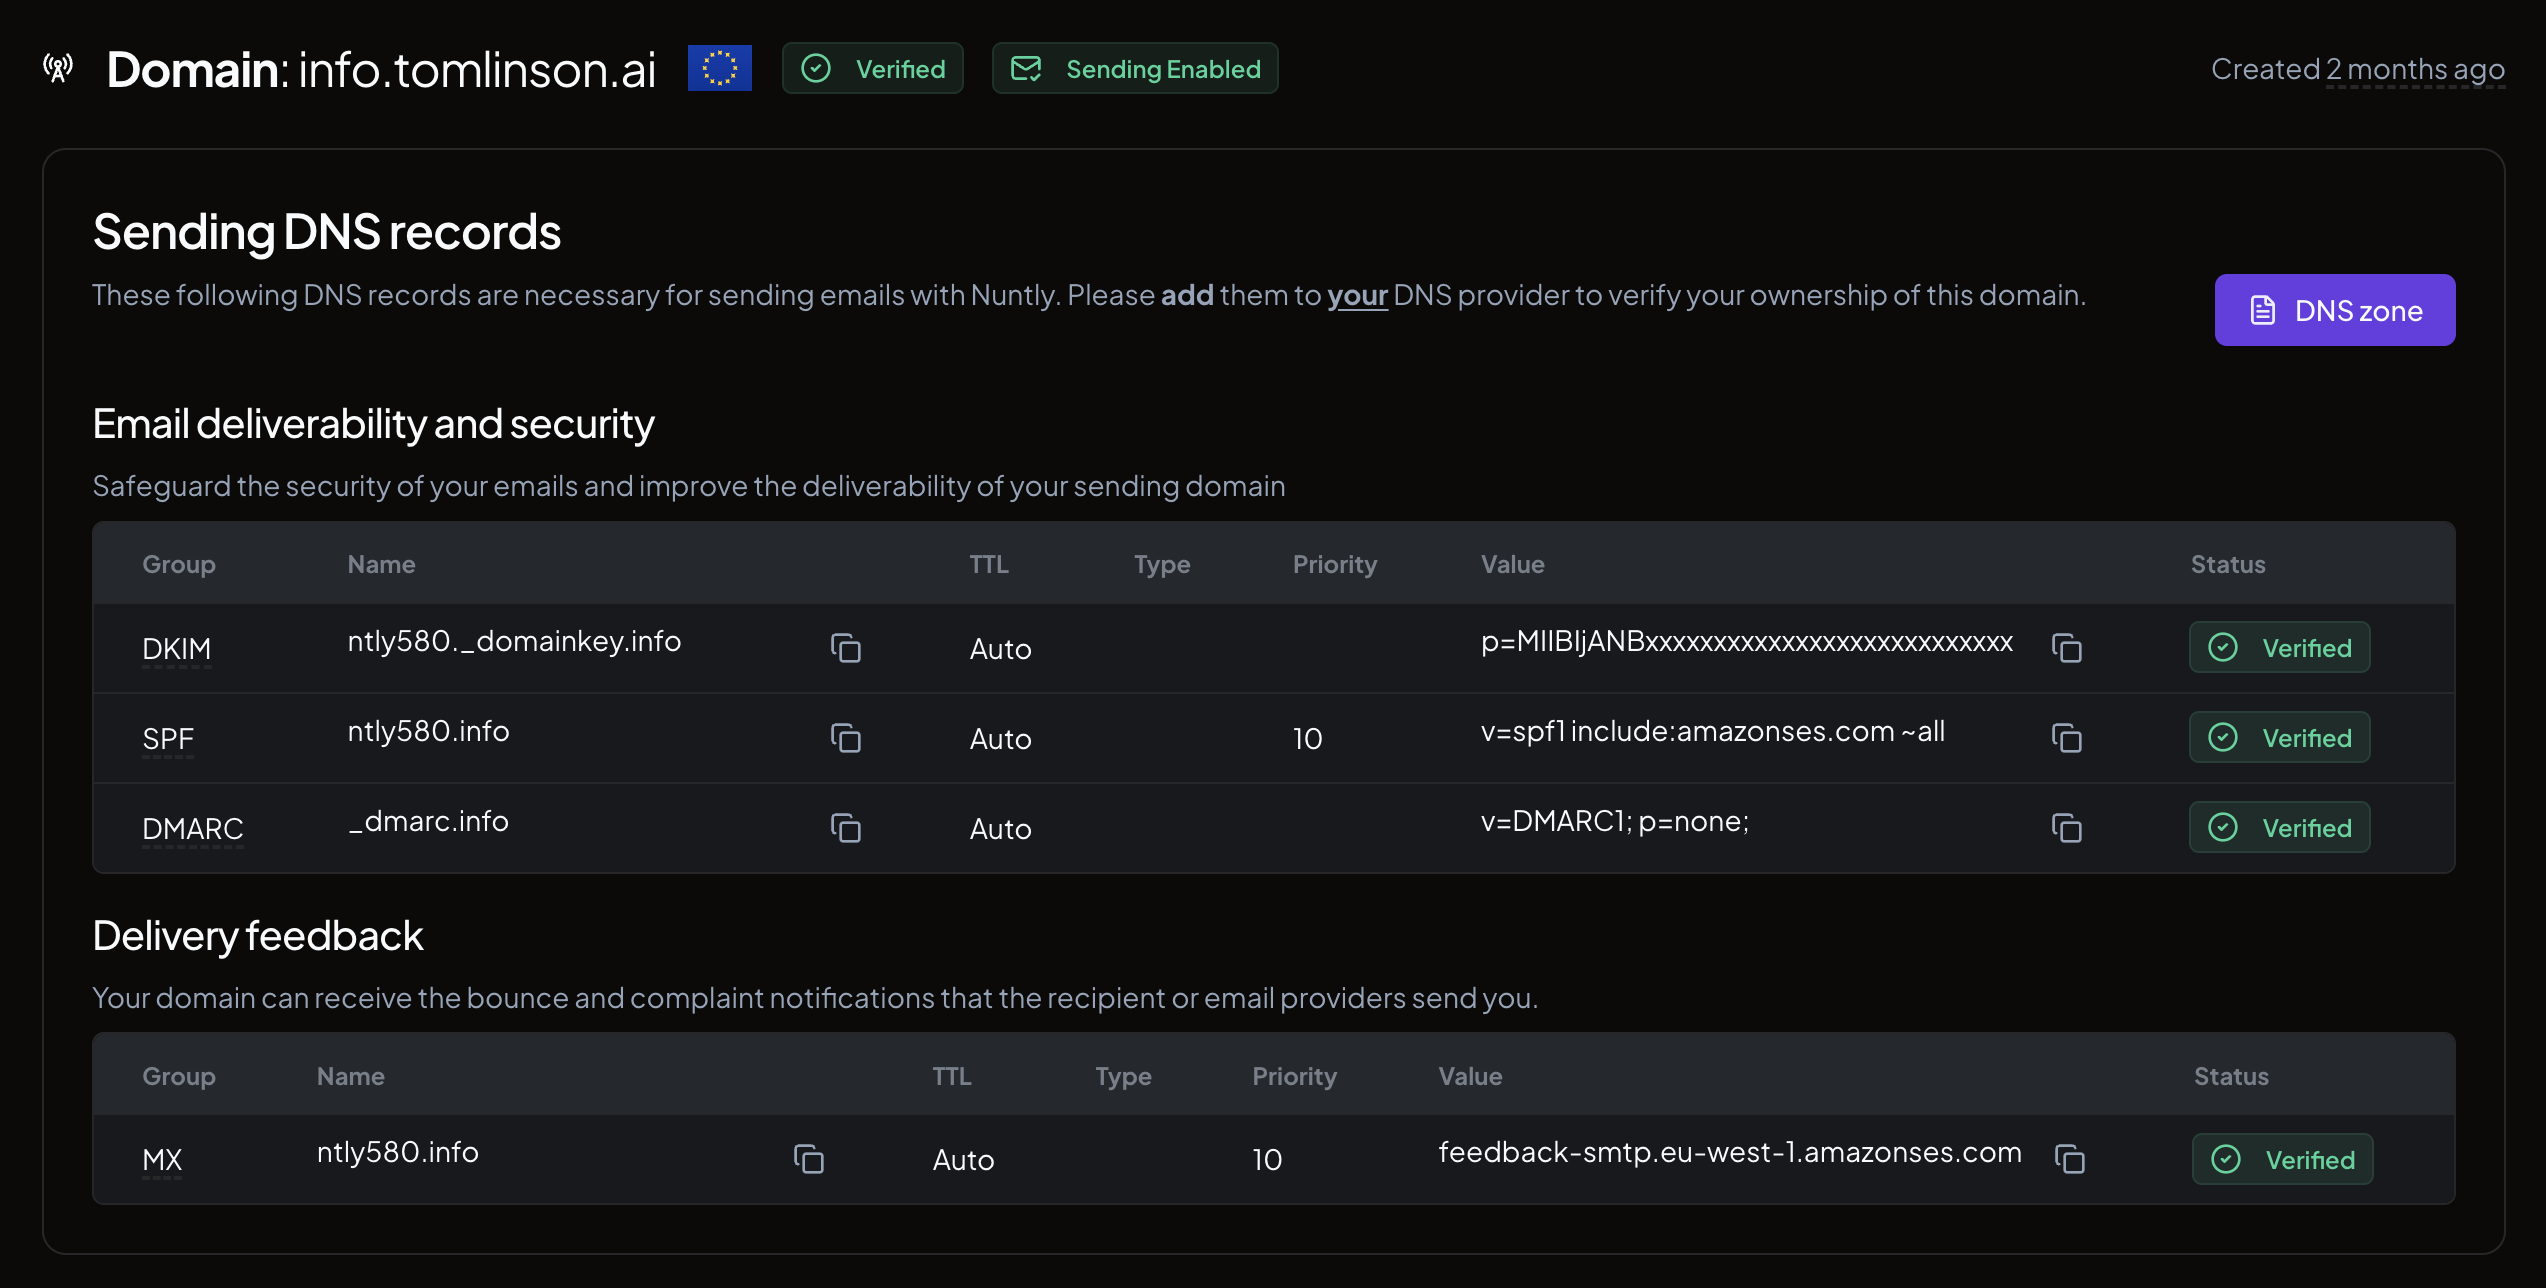
Add records manually
For each record in the table, copy the Name and Value fields and add them as new DNS records in your provider’s control panel. The exact steps depend on your provider. Refer to their documentation for instructions.Import via zone file
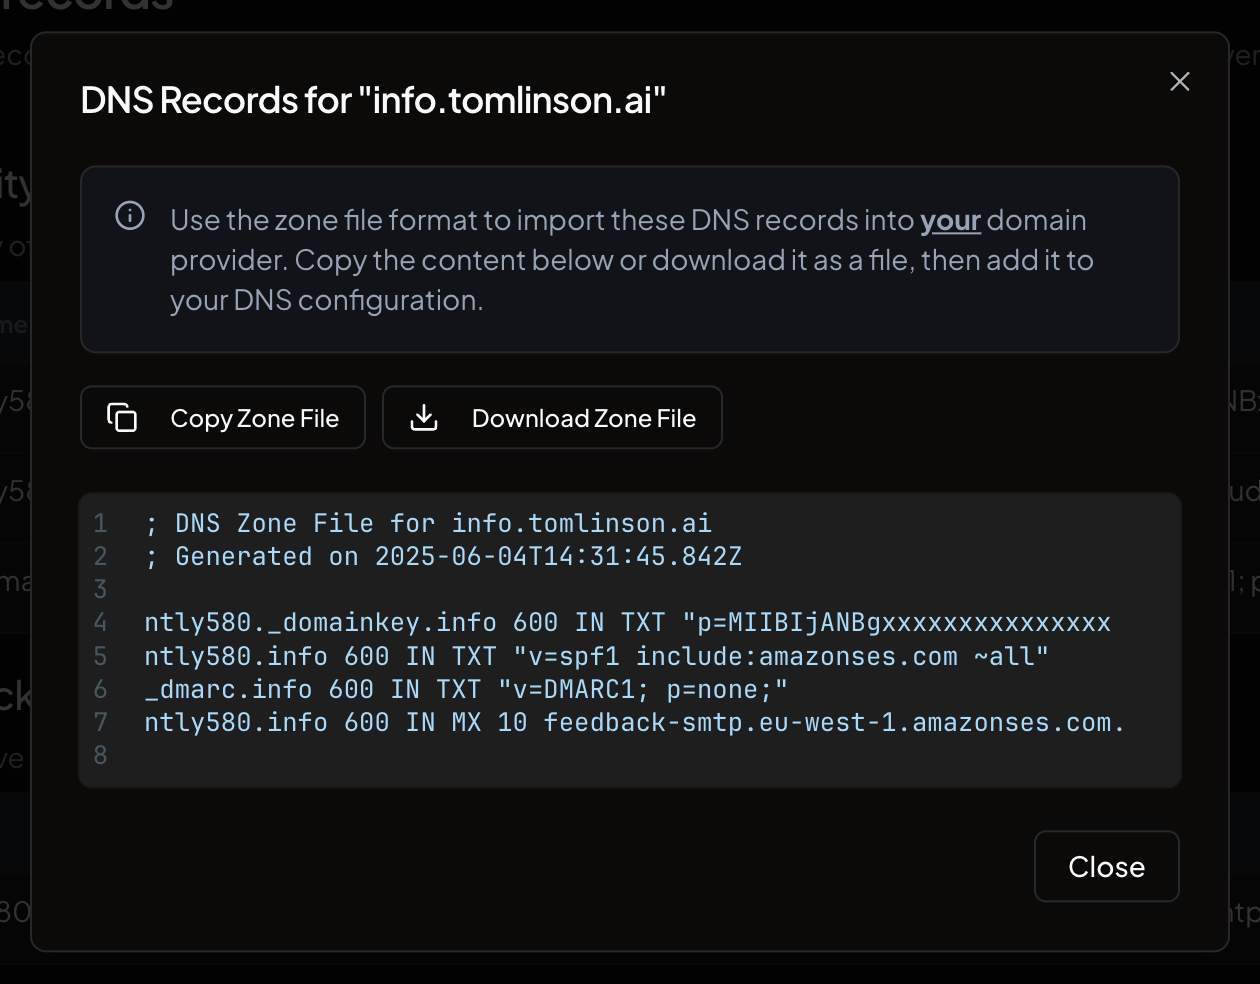
If your DNS provider supports zone file imports, you can add all records at once:- On your domain detail page, click the DNS zone button
- Copy the zone file content or click Download Zone File to save it as a
.zonefile - Import the file into your DNS provider
Configure via MCP
You can also set up your sending domain using the Nuntly MCP server, which allows you to manage domains through natural language commands. See the guide: Supercharge your email stack — natural language automation with Nuntly MCP server.Domain verification
After you add the DNS records, Nuntly automatically checks for propagation. The status badge on your domain page updates as verification progresses. DNS propagation can take anywhere from a few minutes to 48 hours depending on your provider.Enable open and click tracking
Once your domain is verified, you can track recipient engagement. Go to your domain detail page and toggle the switches under Measure engagement:- Open tracking. An event is emitted when the recipient opens your email.
- Click tracking. An event is emitted when the recipient clicks a link in your email.
Tracking toggles are only available after your domain is verified.